Определили ваш договор
Он заключён с ООО «Интернет Решения». Если есть другой договор, сможете переключиться на него в боковом меню
All products for sale must have barcodes. You can use:
You can’t add products without barcodes to the supply request.
If the barcode on the product doesn’t match the one in your account, the product is rejected at the FBP warehouse. Some partners offer relabeling service and print labels with the correct barcode for additional fee. If the service isn’t available, you have to pick up the product.
If you ship products from your warehouse, the shipping provider may accept them without a barcode and deliver them to the customer using the packaging label. However, if there is a barcode, we can identify the product if the packaging label is damaged.
A barcode is necessary to identify the product if the packaging label is damaged. If there is no barcode, we can’t pay compensation in case of loss. Starting March 17, 2026, if a barcode isn’t specified on the PDP when a customer places an order, we still process the order. However, compensation for shipping loss isn’t paid by Ozon.
Rules for adding barcodes:

Open the Products → Add products → Attribute update → Update barcodes section. In the All products tab, select a product and click Add next to it. Choose whether you want to specify the barcode manually or generate it. Click Save.


The system creates a unique barcode for each product. It consists of the OZN characters and the Ozon SKU ID product identifier.
Example: If Ozon SKU ID is 1234567891, The system generates the barcode OZN1234567891.
Generating barcodes takes some time. Once it’s complete, you can view the generated code in an OZNXXXXXXXXXX form.
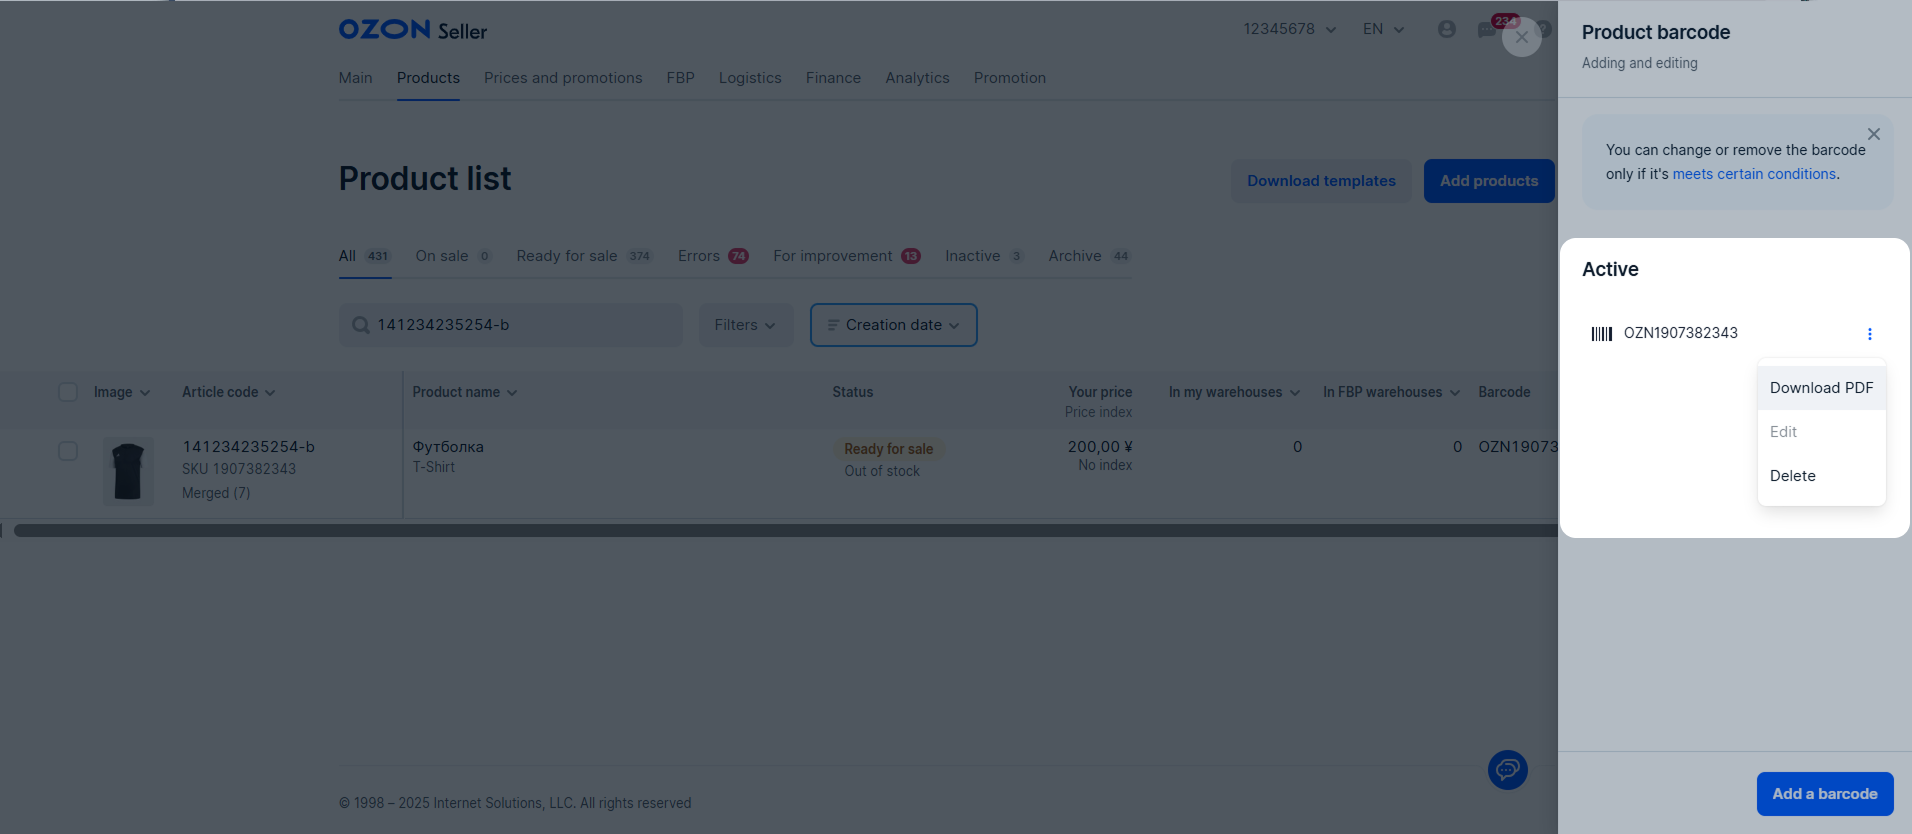
Open the Products → Add products → Attribute update → Update barcodes or Products → Product list pages and click on the barcode. You’ll see the list of barcodes for this product.

You can delete or change barcodes that are on verification or created less than 48 hours ago:
You can’t delete or edit the barcodes if:
If you have several active barcodes linked in your account, the warehouse accepts your products with any of them.
The printed barcode contains:
Open the Products → Add products → Attribute update → Update barcodes or Products → Product list sections. In the product row, click
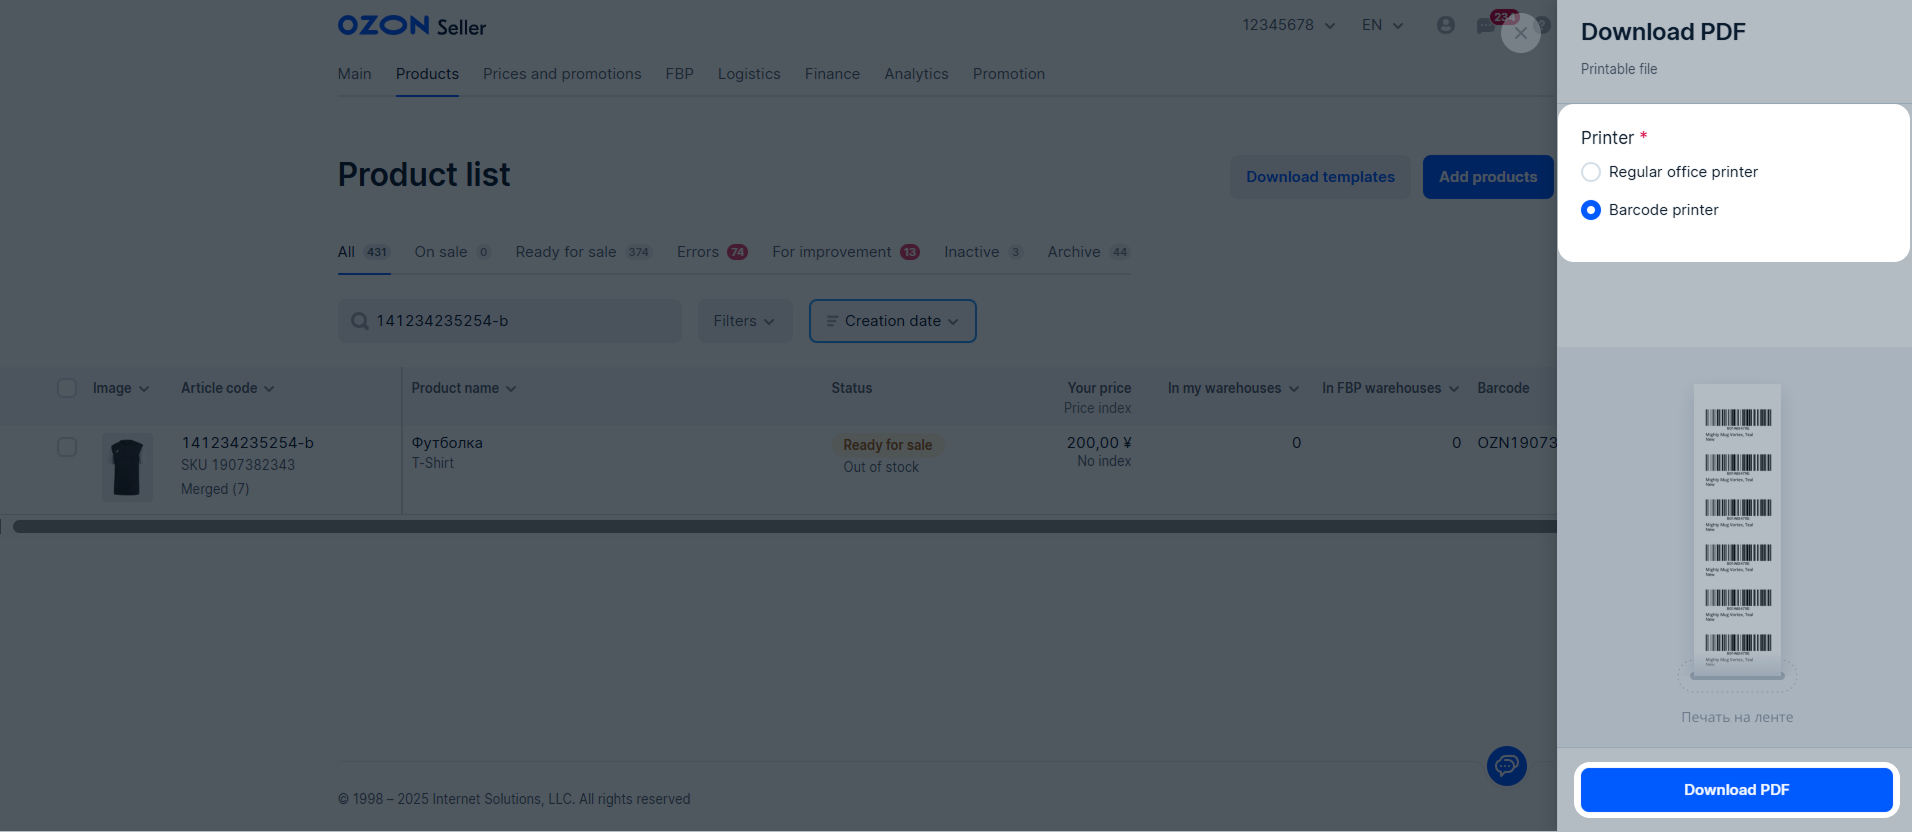
![]() and select Download PDF.
and select Download PDF.
Select the printer type. For a barcode printer, the system adapts the size of the barcodes to the ribbon printing. For an office printer, specify the number of copies and size. It depends on the paper format, the manufacturer barcode, and the product itself. Size options:
Stick a barcode on each product while preparing for the supply. If the product needs additional packaging, stick on it the same product barcode from your account.
The barcode on the product must:
In all cases, the barcode on the product must match the barcode in your account at the time of supply.
Hide menu
Show menu
Выберите договор

Это база знаний для продавцов из стран СНГ и дальнего зарубежья.
Если ваша компания зарегистрирована в России, перейдите в базу знаний для продавцов из России.
Когда вы зарегистрировались на Ozon?
Условия работы и инструкции зависят от даты заключения договора — её можно посмотреть в разделе Договоры
Определили ваш договор
Он заключён с ООО «Интернет Решения». Если есть другой договор, сможете переключиться на него в боковом меню