We’ve adapted the interface,
so that you can view the necessary information for creating a PDP on a single page without switching between steps.
-
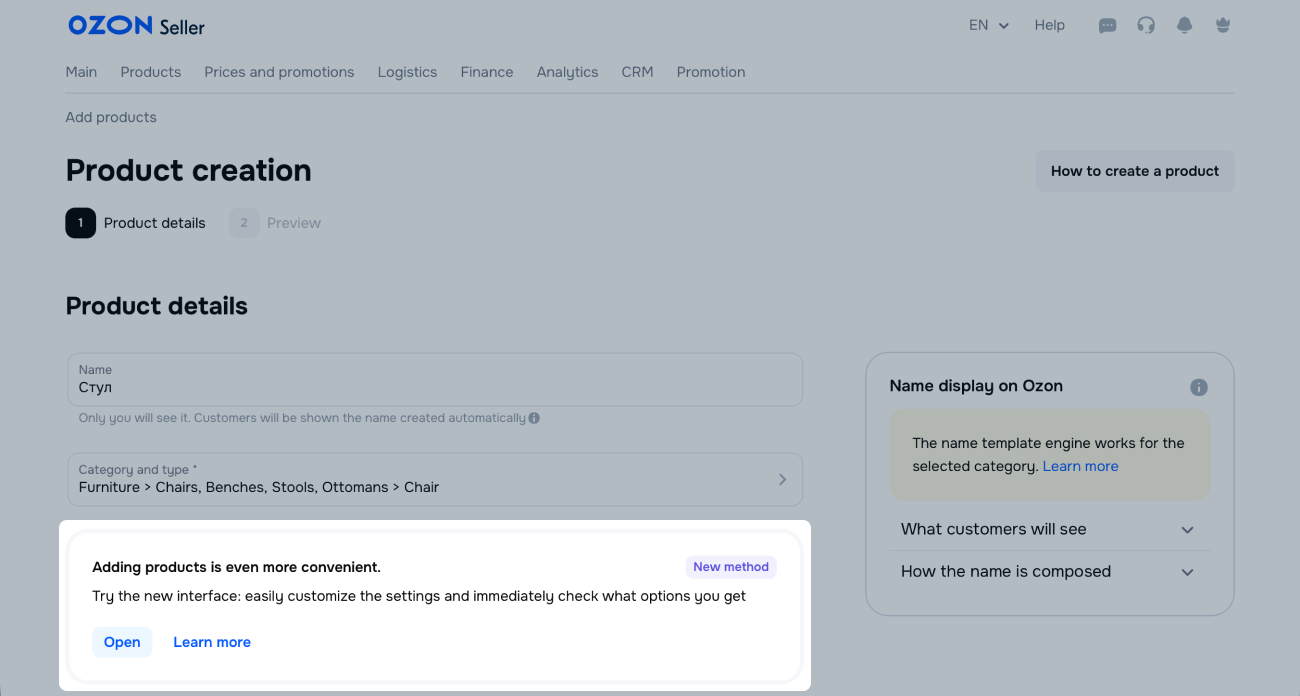
Go to the Products → Add products section and click Manually.
-
Select type in “Clothing” and “Accessories” category.
How to select product category and type
-
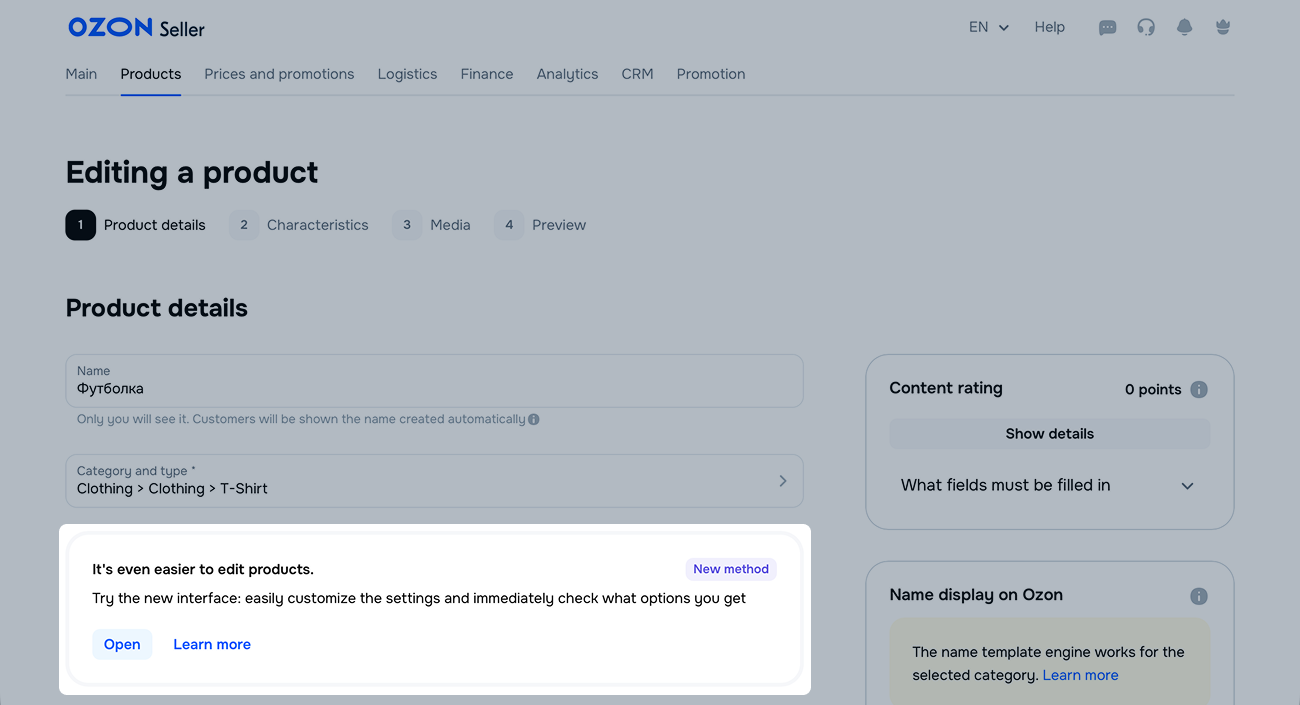
In the Adding products is even more convenient block, click Open.

-
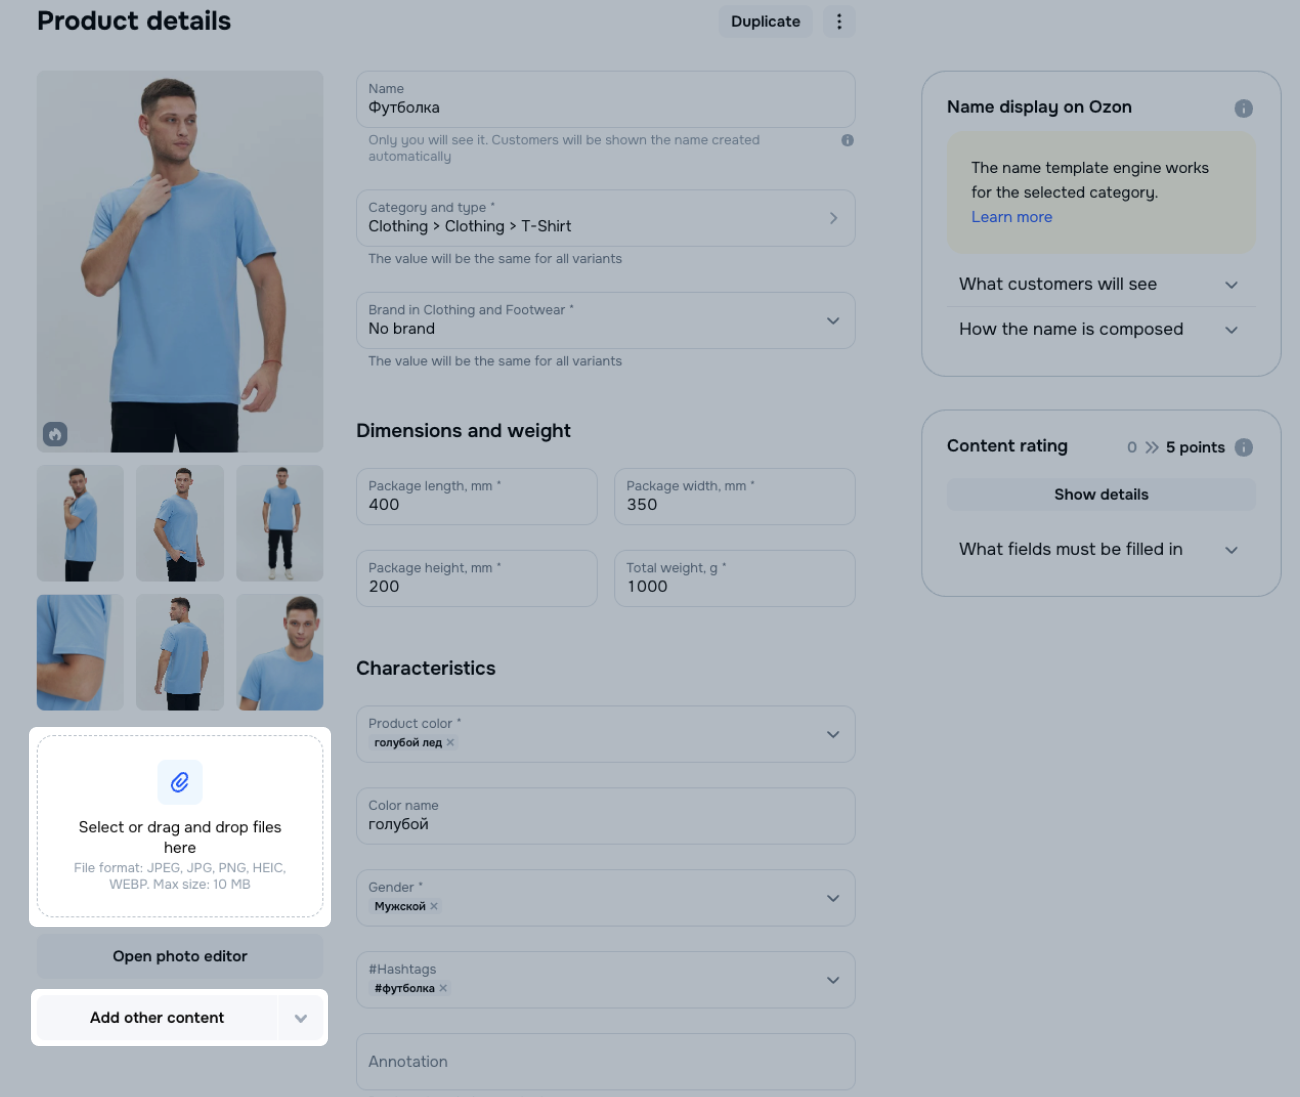
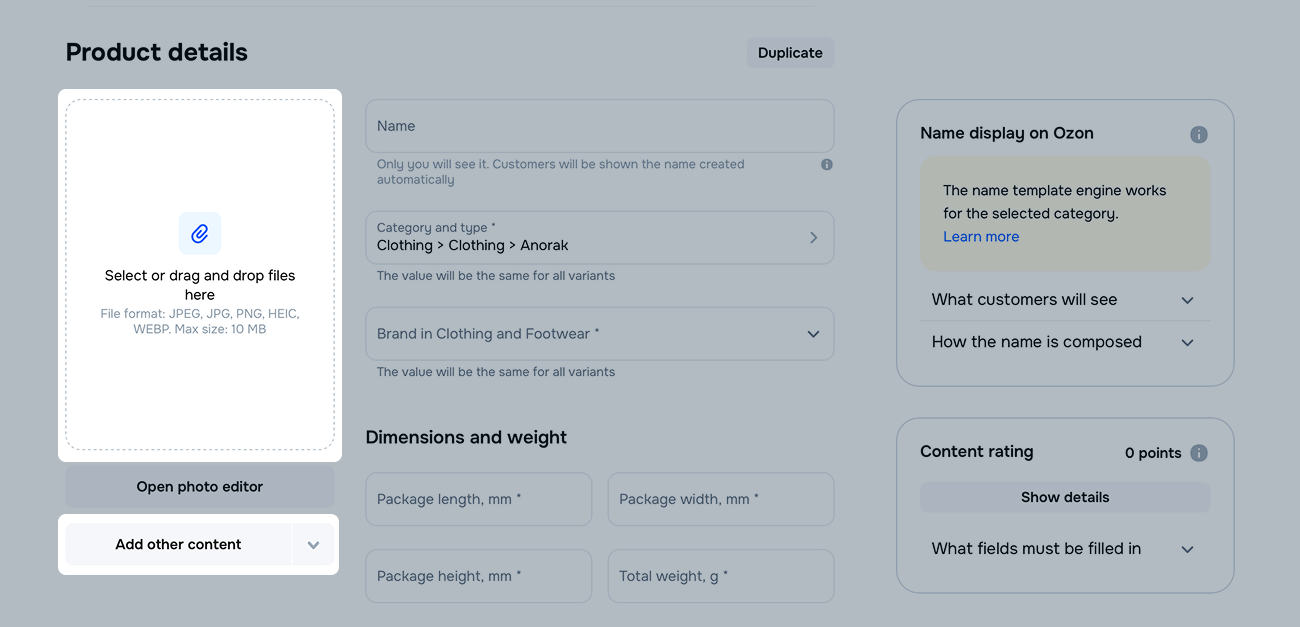
Specify the name and brand, check the category and type. These fields remain the same for all product variants.
-
Specify dimensions and weight.
-
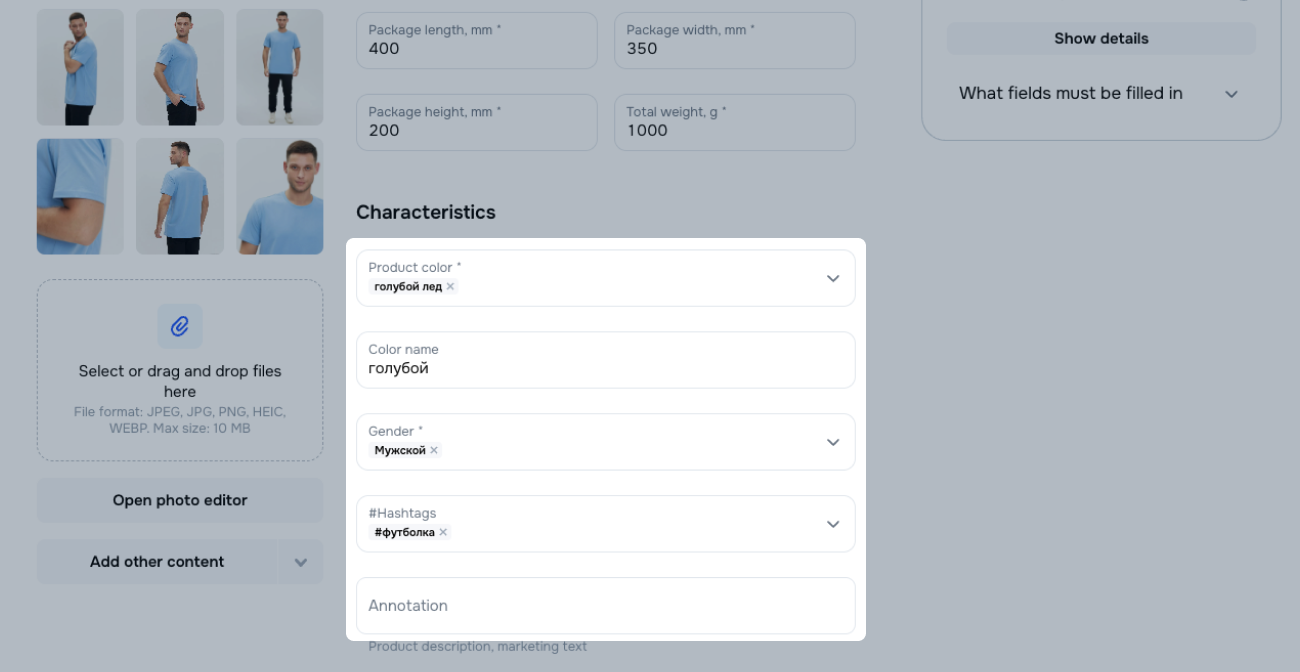
Specify characteristics:
- color and color name: you can create up to 30 colors for one PDP;
- gender;
- hashtags;
- annotation.
-
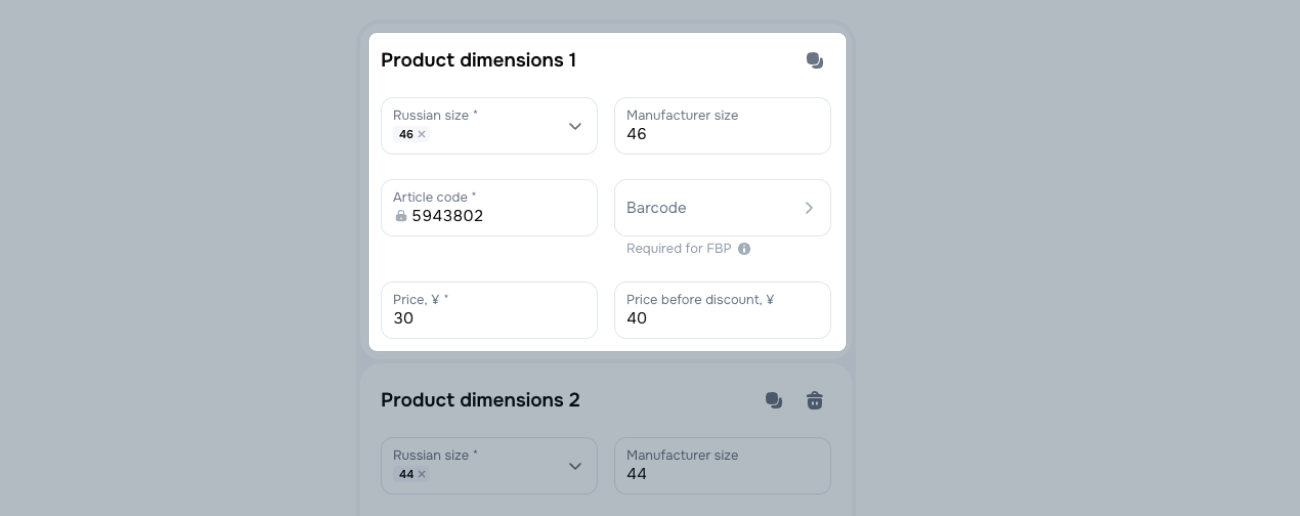
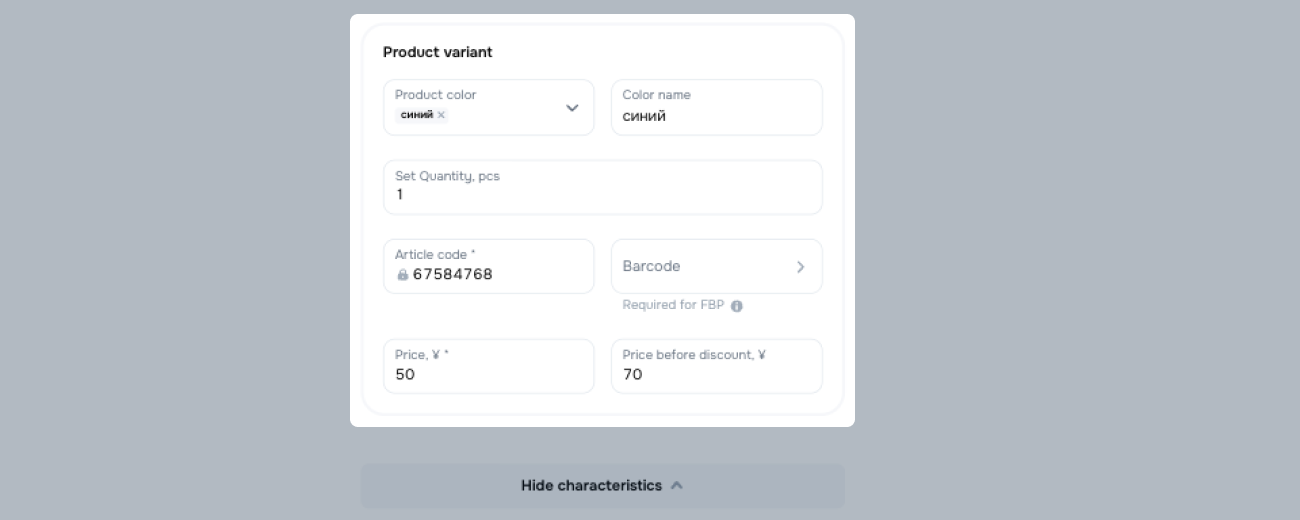
In the Product dimensions block, specify:
- size: you can add up to 15 size types for one PDP;
- article code;
- price and price before discount if necessary;
- barcode: add it manually or generate it. You shall do it if you sell products under the FBP scheme.
Learn more about working with barcodes
-
Click Show more characteristics to fill out more fields.
-
Add photos. To add a video cover, video, rich content, or a size table, click Add other content or  .
.
-
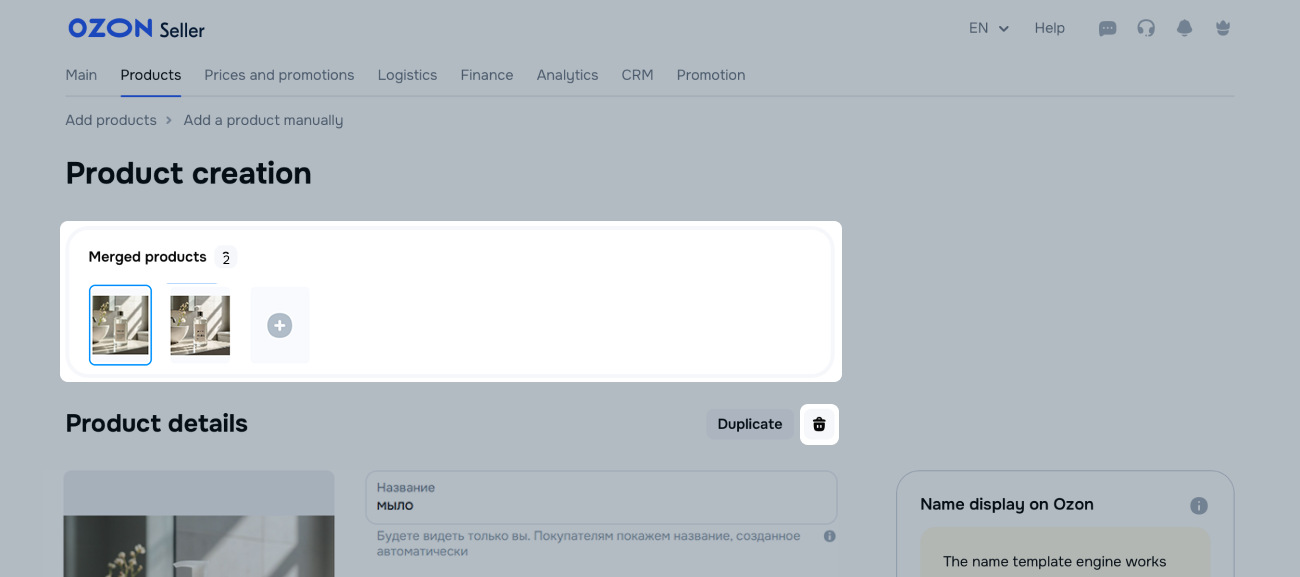
Add other product variants.
- Click
 to create an empty PDP and fill out all the parameters manually.
- Click Duplicate to copy all filled in information except media. Edit parameters that differ and upload photos and videos.
You can:
- switch between variants in the Merged products block;
- remove extra ones: click the
 icon near the Duplicate button or in the variant miniature.

The PDPs are merged automatically for all product variants in one group.
You can view the Merge on one PDP field if you use another method to create or edit PDPs.
Learn more about other ways to upload products
-
Click Finish creating.
-
Go to the Products → Add products section.
-
Select product category and type.
How to select product category and type
-
In the Adding products is even more convenient block, click Open.
-
Specify the name and brand, fill out the Model name (to merge products into one PDP), check the category and type. These fields will be the same for all variants.
If you don’t see the Brand and Model name (to merge products into one PDP) fields, they aren’t used in this category.
-
Specify the product weight and dimensions.
-
Specify the variant characteristics, for example:
- usage,
- case material,
- warranty period,
- hashtags,
- annotation.
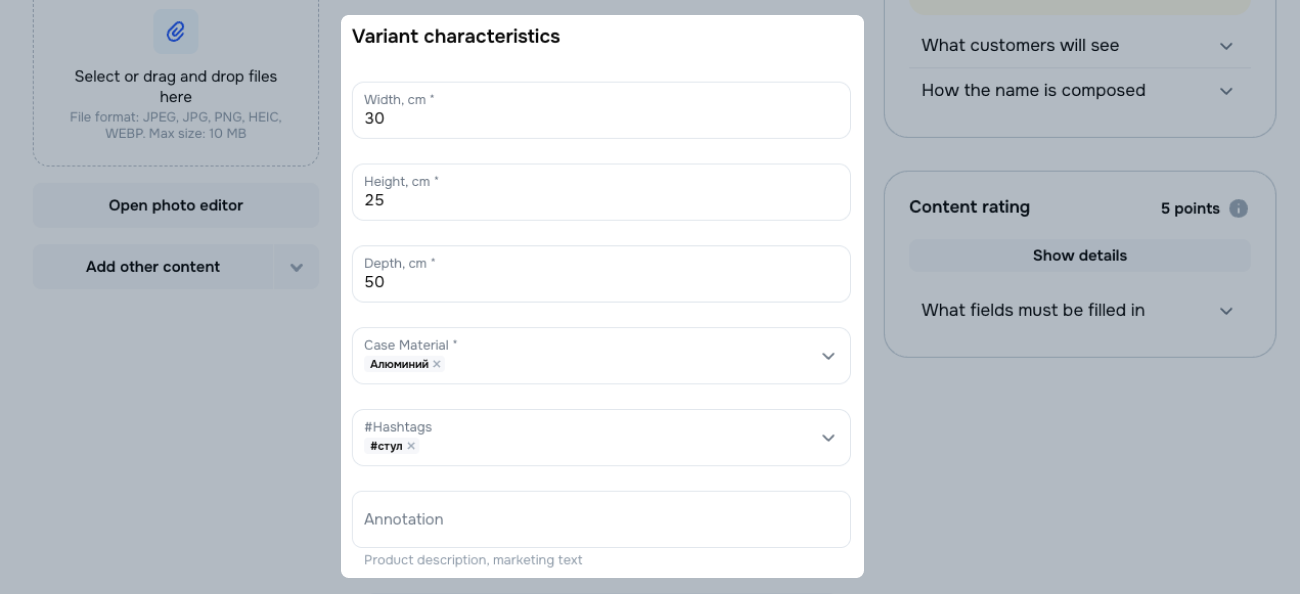
The characteristics and their number may differ depending on category.
-
Fill out the Product variant block. The characteristics in this block differ depending on category. For example, these can be:
- color and its name;
- quantity of products in the bundle;
- volume.
If you can’t create product variants, you can only fill out the article code, your price, the price before the discount, and the barcode.
-
Specify the product article code.
-
Specify the price and the price before discount if necessary.
-
Add the barcode manually or generate it. You shall do it if you sell products under the FBP scheme.
Learn more about working with barcodes
-
Click Show more characteristics to fill out more fields.
-
Add photos. To add a video cover, video, rich content, or a size table, click Add other content or .
-
Add other product variants — up to 30 ones.
- Click to create an empty PDP and fill out all the parameters manually.
- Click Duplicate variant to copy all filled in information except media. Edit parameters that differ.
You can:
- switch between variants in the Merged products block;
- remove extra ones: click the icon near the Duplicate button or in the variant miniature.
The PDPs are merged automatically for all product variants in one group.
-
Click Finish creating.
In the updated interface, you can edit a PDP created in the regular one. Click the link on the bar.
Once created, products are automatically added to the Expedited Review Collection campaign. To disable auto-adding for new products, go to Products → Manage PDPs and disable Adding new products to Expedited Review Collection.
Learn more about Expedited Review Collection
Edit PDPs in the adapted interface
-
Open the Products → Product list section.
-
Find a PDP and click  . If you’ve created the product:
- in the adapted interface, it opens by default;
- in the regular interface, click Open to switch to the adapted one.
-
Make the necessary changes.
-
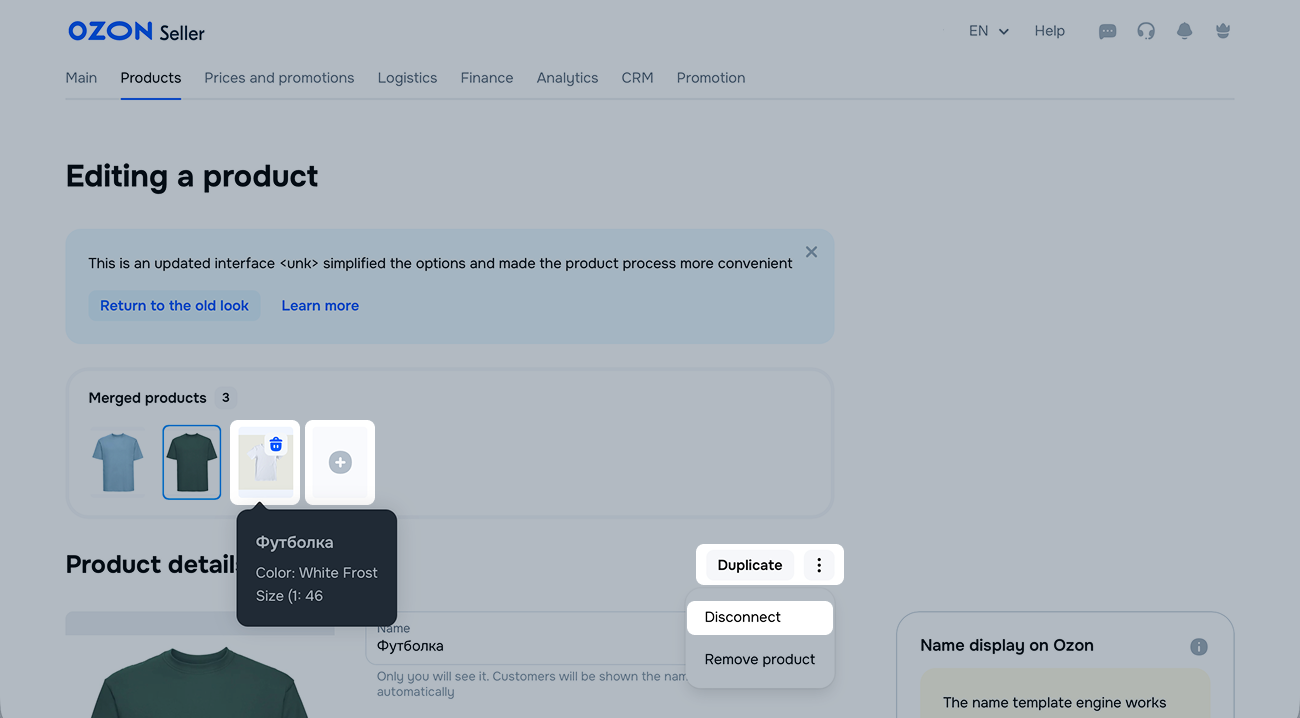
Edit the product variants. You can:
- Create an empty PDP and fill out all the parameters manually: click next to the variant miniatures.
- Copy one variant with all information except media and color for products in “Clothes” and “Footwear” categories: open the variant and click Duplicate the variant.
- Delete a variant: hover the cursor over it and click
 .
.
- Remove a product from the PDP. Click
 and select Disconnect.
-
Click Finish creating.
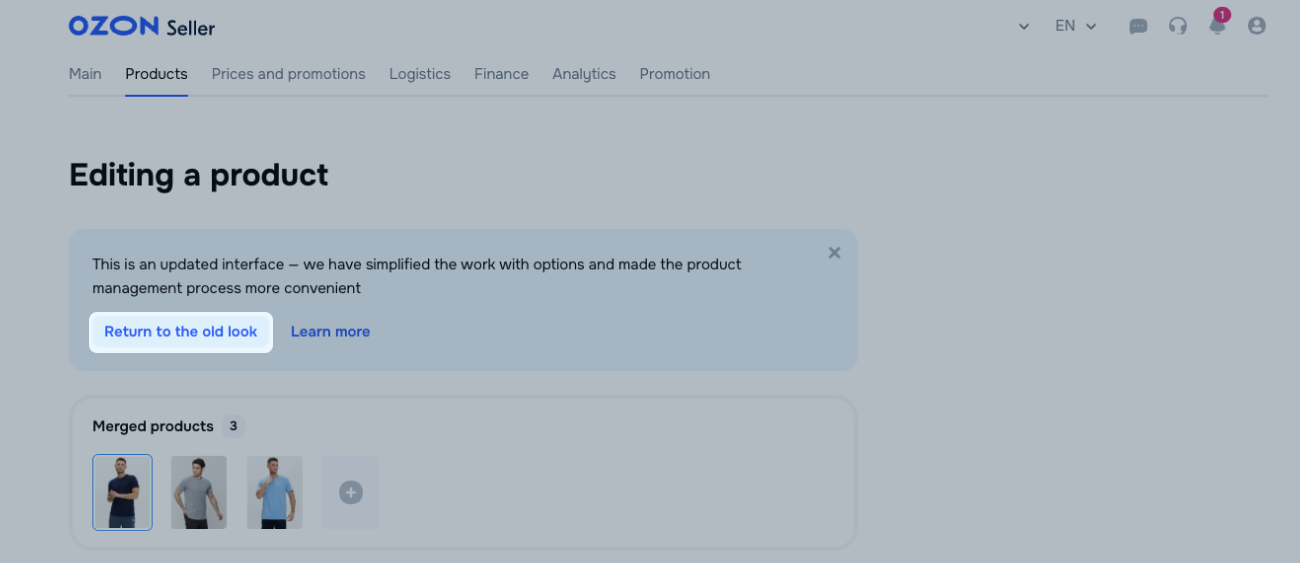
Switch to the regular interface
To edit a PDP in the regular interface, click Return to the old look.
When editing a PDP, it opens in the interface where you’ve created it.
You can switch between interfaces before you start making changes.